

-80x69.png)
To effectively reduce the accident rate on the roads, road safety should be the top priority. However, some traffic and road safety professionals overlook one of the main equipment, road studs, which plays a huge role in road safety. Whether it’s a day or night, Road studs enhance visibility, guiding drivers to carefully pass through roads and reducing the chance of accidents.
This guide provides a detailed knowledge of road studs, to help traffic safety professionals like you, to understand about road studs’ importance and its high need on roads to create safe driving experience for everyone.
What are Road Studs?
A road stud (often known as a cat’s eye or raised pavement markers) is a reflective small safety device, used to highlight roads, tunnels, highways, and bridges, to guide drivers in low-visibility conditions. It is usually embedded over the road, to increase visibility of road surface, to help drivers see the road layout and pass by safely.
Especially in nighttime or low-visibility weather conditions like fog or rain, road studs act as a warning signal, to guide drivers about road curves, junctions, or pedestrian crossings, reducing the accidental situations.
What Material Are Road Studs Made Of?
Road studs are typically made and built from durable materials, designed to withstand heavy traffic, weight, and harsh weather conditions. The most common materials used in road stud making include:
- Ceramic
Pros: Extremely durable, harsh-weather resistant, long life span
Cons: Brittle, can crack under high impact.
- Plastic (PC, ABS, composite plastic)
Pros: Lightweight, corrosion-resistant, cost-effective
Cons: Less durable compared to ceramic
- Solar
Pros: Self-powered, no wiring needed, brighter compared to other materials
Cons: higher upfront cost, requires sunlight (not suggested for tunnels)
- Glass
Pros: Wear-resistant, high reflective when light falls
Cons: Can easily break under Vehicle pressure
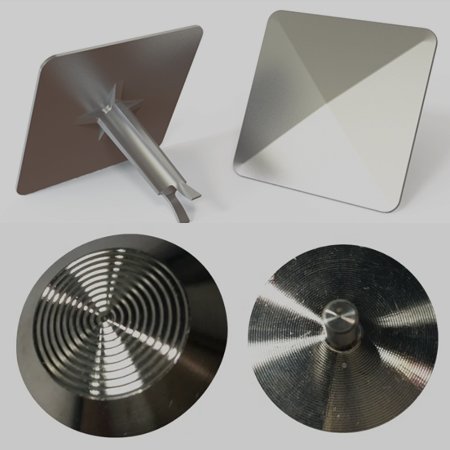
- Aluminum
Pros: Long-lasting, weather-resistant, strong compared to plastic and glass
Cons: More expensive compared to plastic
- Stainless Steel
Pros: Very strong and Rust-proof
Cons: Quite slippery when wet, expensive
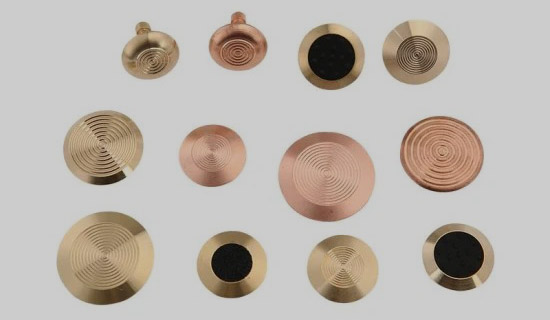
- Brass or Copper
Pros: Durable, aesthetically pleasing, corrosion-resistant (long lifespan)
Cons: Expensive, softer than steel and aluminum
Color Coding of Road Studs: What do they indicate?
- White Road Studs (Most Common)
White road studs are commonly used to guide same-direction traffic and installed between highways and center of roads. This helps drivers analyze lanes and judge their path by observing white road studs pattern, during driving on the road, reducing the potential risk of vehicle collision.
- Yellow Road Studs
On the other hand, yellow road studs are used to guide opposite-direction traffic, serves two purposes at the same time. It’s usually installed on right side, to guide one side of traffic about the lane edge, and guide second side traffic about not crossing the lane. In some road situations like sharp curves or intersection, yellow road studs act as a hazard warning, enhancing visibility, and guiding drivers.
- Red Road Studs
Red road studs are used for special purpose to indicate danger or warning sign to drivers about wrong-way or edge-warning. It’s usually installed at any dangerous zone of road that are more-prone to accidents, is slippery, or damaged, to alert drivers and guide them to not enter the dangerous zone.
- Green Road Studs
Green road studs are used to indicate safe zones and special lanes. Green road studs guide drivers and ensure road safety, allowing them to safely cross the lane without any risk of double-lane crossing or vehicle collision.
How Road Studs Work?
Based on working modes, road studs are categorized in two types. Below is the explanation of each one of them:
- Reflective Road Stud
Reflective road studs work on “retroflection” principle, it doesn’t light itself, instead it requires vehicle light to shine and light up. When the vehicle light falls on the reflective road stud, it reflects the light back directly to driver’s eyes, increasing the visibility and guiding driver about the road lane and direction.
- Solar-Panel Road Studs
Solar-Panel road studs (also known as active road studs) are equipped with LEDs, light sensor, solar-panel, and don’t require vehicle light to light itself. In the daytime, these studs use sunlight to recharge by solar panel. When the sky gets dark, light sensor in solar-panel road studs detects the change in light and turns on its LEDs.
Different Types of Road Studs
Road studs come in different types and materials, catering to different benefits and purposes of road safety. Here’s the explanation of each type of road stud:
- Ceramic Road Studs
Ceramic road studs are reflective road studs and are the most commonly used type compared to others. Its outer shell is made of Ceramic or Glass material, while inside area is filled with reflective material.
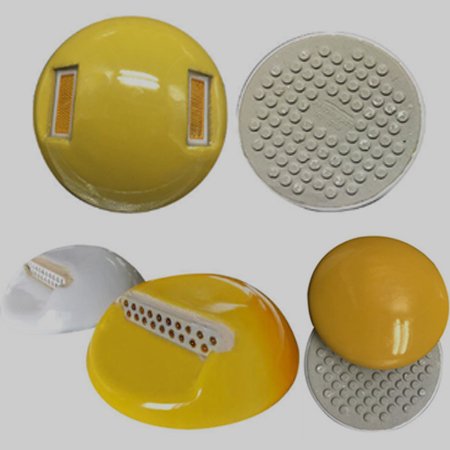
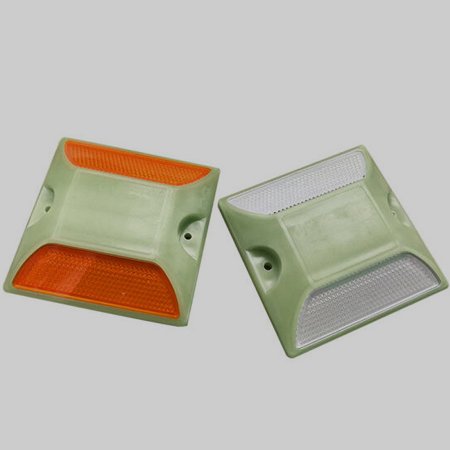
- Plastic Road Studs
Plastic road studs come with special reflective properties. Its shell is made of high-quality, durable plastic material and inside is filled up with the reflective material, helping it to brightly reflect when a light falls on it.
- Solar Road Studs
Solar road studs are most Eco-friendly and innovative type in the road stud family. It comes equipped with LEDs and solar panels, installed on top of road stud. Solar panels get charged during daytime and use the charged energy to light up LEDs during nighttime.

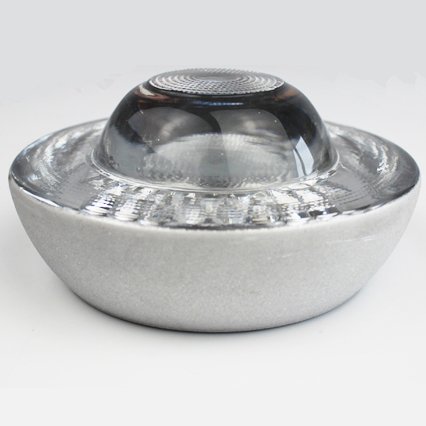
- Glass Road Studs
Glass road studs are equipped with high-quality glass material beads and installed on top of road studs, making them look more fashionable, visible with its road cat’s eyes reflective capability.
- Aluminum Road Studs
Aluminum road studs are made up of high-quality aluminum material, making them more durable, robust and ideal for long-term use. These road studs can easily withstand harsh weight and frequent crushing of vehicles, and cannot get damaged easily.
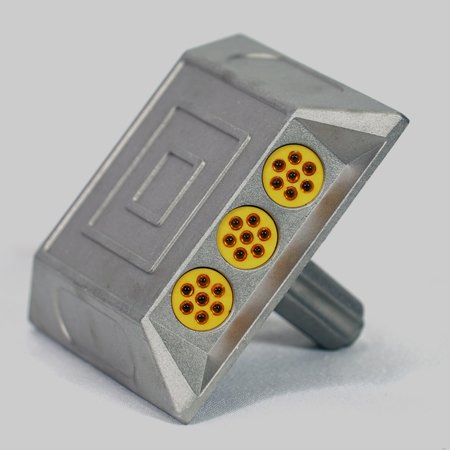
- Stainless Steel Road Studs
Stainless steel road studs are built with high-grade stainless steel, which makes it more durable, rust-proof, and look more premium. The reflectors or LEDs over its top increase more visibility, making them ideal for use in wet or coastal areas.
- Copper Road Studs
Copper road studs are made up of copper alloy or solid copper for more high-visibility, aesthetic appeals, and corrosion-free properties.
How to Install the Road Studs?
Here are the step-by-step instructions for installing road studs:
Step 1. Purchase Road Studs
The first step is to purchase the correct road stud based on color, type and safety requirements. You can choose from reflective, solar panel, stainless steel, glass, aluminum or copper road stud.
We as a traffic product manufacturer understand the importance of Road Studs to ensure drivers safety and reduce accidents. At jackwinsafety we offer a wide range of road studs in different materials to ensure traffic and road safety professionals, like you, get the right solution for your needs.
Step 2. Demarcate the Working Area
After making a Road stud purchase, demarcate the working area to create a safe and enough working space for workers.
Step 3. Plan, mark, and Drill Hole
Analyze the road design, traffic direction and then plan the correct road stud placement. Mark the chosen spot with chalk or spray paint and drill a hole using concrete drill or core cutter.
Important: Skip this step if you’re using surface-mounted studs.
Step 4. Clean the Road
Use a blower or dry brush and properly clean the road to clear away dirt and debris. You can also use water pressure for cleaning, but make sure to remove excess water before installing the road stud.
Step 5. Apply Epoxy or Bitumen Glue
Use one part of hardener and one part epoxy glue, prepare a settled mixture and apply it into the hole using brush.
Step 6. Place and Fix the Road Studs in Place
Hold and firmly push the road stud through the glue into the hole, ensuring it’s aligned. Then, remove the excess adhesive from the road stud base for later use.
Step 7. Allow Time for Curing
Leave the air stud for 30–60 minutes to dry the adhesive. Ensure to not disturb the road stud installation or base.
Step 8. Re-open the Road
Verify if road studs are firmly fixed; if so, re-open the road for traffic.
Benefits of Using Road Studs
Improve visibility at night: Most accidents happen during nighttime. Installing Road studs create awareness, guide and alert drivers by reflecting light towards driver’s eye, enhancing visibility at nighttime and low-light conditions.
Provide Driver Guidance: When road studs light up and reflect light, they guide drivers to their correct lane, especially on sharp curves or foggy roads.
Reduce Accident Possibilities: As road studs light up during nighttime and low-light conditions, it effectively reduces the possibilities of accidents, by guiding drivers about the path.
Supports Traffic Flow: Road studs clearly mark road paths and lanes, keeping traffic organized and guiding drivers about their lane, preventing them from crossing into other lanes.
Wrapping Up
Road studs are a simple yet powerful equipment to enhance road safety. By adopting best practices and investing in high-quality road studs, road security contractors and authorities can improve road visibility in low-light, reduce accidents ratio, and improve overall traffic flow.
If you are also considering purchasing high-quality road studs, please contact JACKWIN now to explore a wide range of road studs made of different materials and contribute to a secure road environment!

