

-80x69.png)
Shed ramp is an effective solution to get smooth access inside the elevated floor of the storage shed and easily walk in heavy equipment, tools, and machinery. However, the installation process of the shed ramp varies depending on its type and construction material.
That’s why we’ve crafted this guide, explaining in detail and clear step-by-step instructions on how to build a stable shed ramp yourself. But before that, we’ll discuss a few basics first.
What Is a Shed Ramp?
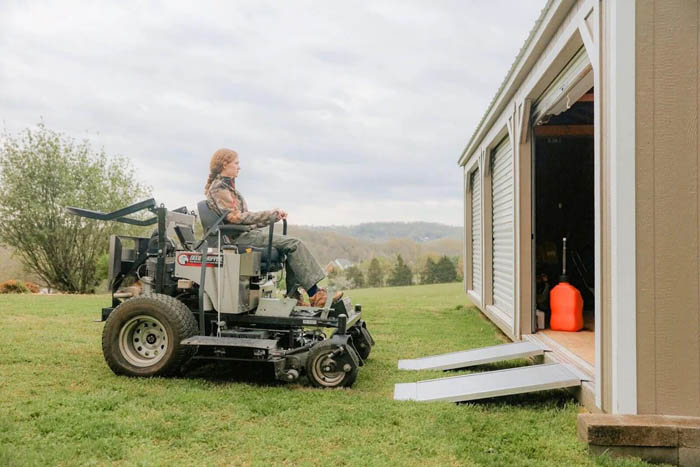
A shed ramp is a slope or inclined surface that provides smooth access to sheds. When installed, the ramp’s sloped surface helps walk in and lift heavy equipment (like lawnmowers, wheelbarrows, bikes, or ATVs) over the shed threshold. Apart from that, they can be made with different materials, slope ratios, widths, traction, and even support structures.
What Are Shed Ramps Made of?
Shed ramps can be made with different materials depending on preferences, equipment weight capacity, and even budget. Common materials include wood, aluminum, concrete, metal, or steel. Though shed ramps made with these materials are heavy, they are often permanently installed. That’s why, for individuals with portable and quick shed ramp installation needs, plastic or rubber-based shed ramps are also manufactured and available in the market.
Types of Shed Ramps
-
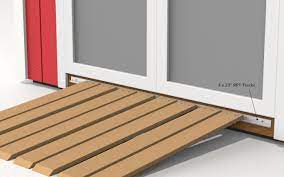
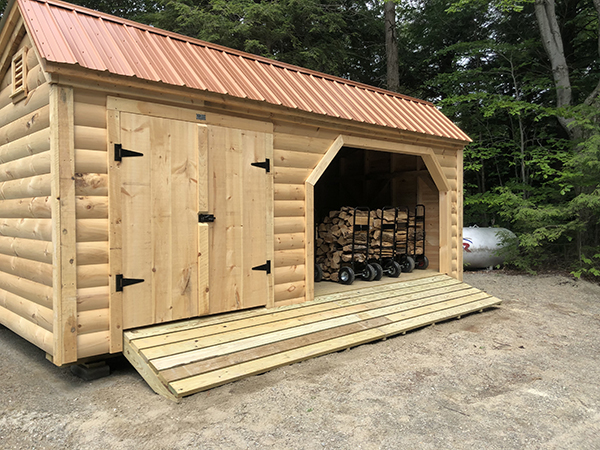
Wooden Ramp for Shed
Wooden shed ramp is an excellent DIY option because it’s super affordable, easy to build, and customize. Also, it’s ideal for moving light to moderate-weight equipment. But with so many wood options, we suggest using pressure-treated lumber. This wood resists moisture, insects, and rotting.

-
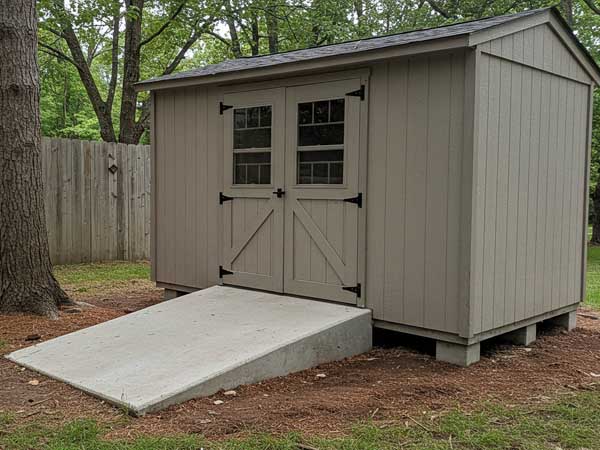
Concrete Shed Ramp
Concrete ramps, on the other hand, are the most durable and permanent ramp solution. It is smooth, strongly structured, and has a non-slip surface. Though once installed, you cannot reposition them. So, it’s vital to carefully build the concrete ramp in one go.
-
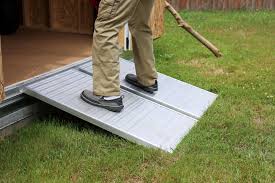
Aluminum Shed Ramps
Aluminum ramps are lightweight, portable, and perfect for a shed entrance. While choosing, remember to go for corrugated aluminum models with pre-installed grip patterns because smooth aluminum can get slippery in rain or snow.

-
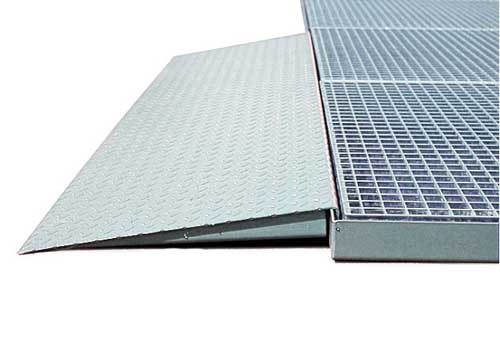
Metal Ramp for Shed
A metal ramp is generally stronger and heavier than aluminum. That’s why they’re perfect for riding heavy-weight equipment. Though metal corrodes easily. Therefore, we suggest using either galvanized or powder-coated metal for the ramp, as they have corrosion-free characteristics.
-
Tuff Shed Ramps
Tuff Shed ramps are branded, pre-made, and actually designed specifically for Tuff Sheds. So, when you order a Tuff Shed ramp, make sure you provide the correct shed model and door dimensions. This simple measure helps avoid alignment or sizing issues during installation.
-
Steel Ramp for Shed
Steel ramps work best as loading ramps in industries since they’re heavier and sturdier, compared to aluminum and wood ones. But they have a greater chance of corrosion, too. To prevent this, you will need to apply a rust-proof sealant annually to maintain its durability.
-
Portable Shed Ramp
Portable shed ramps are easy to move, carry, stack, and fold. You can use these ramps anywhere where you need to create a slope in order to access an elevated surface. You can even utilize these portable ramps to aid individuals with mobility disabilities.
-
Permanent Shed Ramps
As is obvious, permanent shed ramps are installed permanently for longer use. They can be made up of wood, concrete, steel, or aluminum. However, you need to add anchoring brackets during installation. This secures the ramp and prevents the ramp from shifting.

-
Ramp for Storage Shed
Ramps for storage sheds are available in the market in different materials (metal, steel, wood, and rubber). Just make sure the ramp you choose must support at least 2x the heaviest equipment (lawnmowers, ATVs, etc.) weight, to avoid sagging or breaking.
-
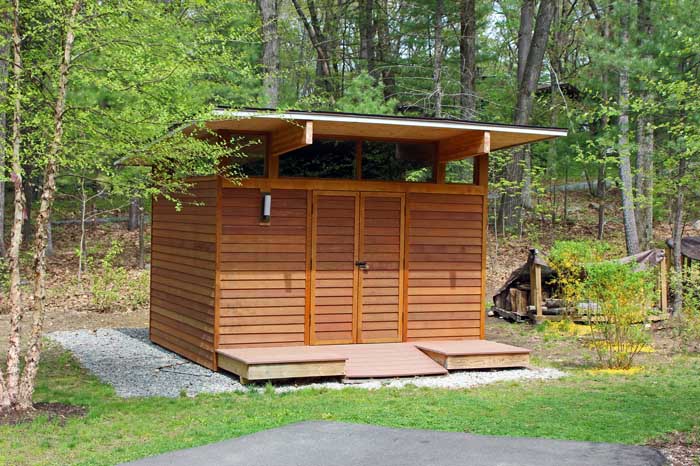
Garden Shed Ramp
A garden shed ramp is typically lighter, smaller, has a gentle incline, and is built for frequent use. They’re often made using wood or aluminum. While building, you must add a slight side slope or spacing between boards. This ensures that water doesn’t collect and damage your tools or rot wood.
Guide Step by Step to Build Your Shed Ramps – DIY
One of the most asked questions is how to build a DIY shed ramp. Well, that’s exactly what we’re going to unwrap in the next sections. As mentioned earlier, there are several material options available for shed ramps, but when it comes to building shed ramps on your property, wood is the easiest and most affordable material for DIYers.
Therefore, we explain the process of building a wooden shed ramp. However, by the end, we’ll also shortly cover the process of building a ramp with concrete, steel, or aluminum material. So, without further ado, let’s get started!
Initial Planning: Gather Tools
Before you start building a shed ramp, it’s vital that you have all the necessary equipment available on your side. If you don’t have them beforehand, while halfway, you may have trouble building the ramp due to incorrect or not having the right tool. Below, we’ve listed all the tools you might need:
- Measuring Tape
- Level (4’ long)
- Saw (Circular or Hand Saw)
- Power Drill and Bits
- Hammer
- Screws and Nails
- Lumber (Pressure-Treated Wood)
- Carpenter’s Square
- Pencil or Marker
- Protective Tools (Gloves, Goggles, Ear Protection)
- Anti-Slip Tape or Tread Strips
- Shovel or Rake
- Deck Screws or Lag Bolts
Steps for Building a Ramp for a Shed
After you have gathered all the mentioned tools, now wear safety tools and start the shed ramp building process by following these step guidelines:
Step 1: Inspect the Shed Entrance and Ground Level
This step is very critical, as inspecting the overall height from the ground to the shed entrance tells you exactly how much height of wooden ramp you may need.
Before you take measuring notes, first, check for uneven ground, poor drainage, or root or rock obstructions because you cannot create a shed ramp on these ground abnormalities. So you must ensure that the ground is leveled, completely dry, and there are no rocks or obstructions in the shed entrance way.
Step 2: Measure the Height and Width of the Shed Door
Now is the time to measure the height (from ground to shed entrance) and width of the shed door. For that, grab a measuring tape and first note the vertical distance from the ground to the top of the shed floor (often called rise).
After measuring height, measure the shed’s door width. This will determine the width of your wooden ramp.
Step 3: Calculate the Proper Ramp Slope and Length
Next, you need to calculate and find the ramp slope so you can cut the wood according to the shed measurements. Generally, an 8-inch slope is perfect per 1 inch of rise (ground-to-shed floor height). But for people with disabilities needing to access the shed, a 12:12-inch slope per 1-inch rise is ideal.
To put it more simply for you, multiply the total value of rise by either 8 or 12 (based on your slope need) to find the final slope value. For instance, if your shed height/ rise is 12 inches, and you want a 1:8 slope, by 12 X 8, the ramp length should be 96 inches (8 feet).
But when it comes to slope steepness, a less-steep slope is always recommended instead of a steep slope. Because a steep slope = danger and a greater chance of slipping while driving on the equipment.
Step 4: Choose the Right Lumber and Materials
For the wooden shed ramp, we suggest you pick up the pressure-treated wood because this material can resist rot and pests.
Also, use 2×6 or 2×8 boards for joists, 5/4 decking boards or 2×6 boards for the ramp surface and exterior-grade screws or galvanized nails. You can even add gravel or concrete blocks underneath the ramp (for added base support).
Step 5: Clear and Level the Ground Surface
It’s a very essential step to clear out obstructions, such as grass, rocks, or debris, from the ramp area. Also, use a shovel or rake and then level the ground. That way, the ramp sits flat on a level surface and doesn’t wobble when you walk on it.
Bonus Tip: We suggest you pour a compacted gravel base or concrete slab at the shed ramp area. This not only improves stability and drainage, but also prevents wood contact with the soil.
Step 6: Cut the Ramp Boards and Support Joists
Next, you’re going to cut ramp joists, cross support, and decking boards. But before you cut, remember the height of the shed floor and ramp width you calculated in Step #2, and also the ramp length you calculated in Step #3.
Reminder: Wear eye protection and gloves before starting to cut.
- First, cut the Joists
For that, use 2×6 or 2×8 pressure-treated boards. To cut, lay the joist board flat on the ground. At one end, mark the rise height (e.g., 12 inches). At the other end, mark the total ramp run length (e.g., 96 inches). Then, grab a chalk and draw a diagonal slope from the top of the rise to the end of the ramp. Next, grab a circular saw and cut along this marked diagonal.
- Next, cut the cross support
For that, use 2×4 or 2×6 pressure-treated lumber. Before you cut supports, first, measure the exact space between your joists. Then, cut cross supports to that length and that’s it.
- Lastly, cut the deck boards (Ramp Surface)
For that, use 5/4 decking boards or 2×6 pressure-treated lumber. Then, lay them and cut each board to exactly the width of your ramp. For instance, if the ramp is 48 inches wide, cut each board to 48″.
Tip: Label each piece to avoid mix-ups during assembly.
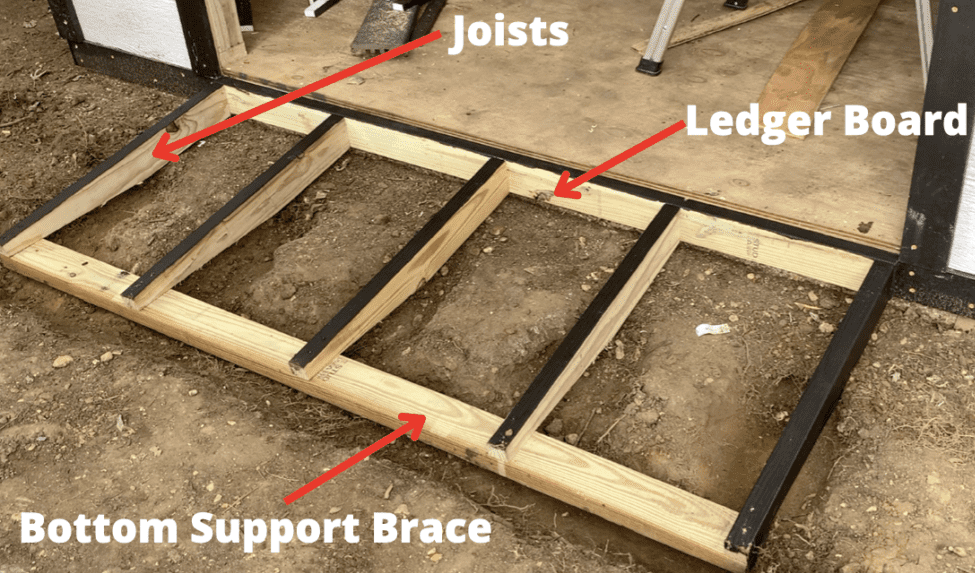
Step 7: Assemble the Ramp Frame
Next, simply lay the cut joists on a flat surface. Afterward, connect the joists with the cross-supports (ledger board). For that, attach the rear of cross-supports into joists, then screw them together. Make sure you space them 12 to 16 inches apart.
Step 8: Secure the Ramp Frame to the Shed Base
Now, place the ramp frame at the shed entrance. Then, firmly anchor the frame with the shed’s base/ ground using lag bolts or metal brackets. Over the frame, you’ll install wooden deck boards, so you must ensure that the frame connection is solid to the ground.
Tip: Jackwin suggests you leave a small gap under the shed lip for water runoff and airflow.
Step 9: Install Deck Boards on the Frame
Now is the time to finally lay your wooden deck boards perpendicular to the joists. Then, grab exterior-grade deck screws and each deck to the frame. While you install, make sure you leave a small gap (1/8 inch) between each board. These little gaps help with drainage and prevent wood from being damaged.
Step 10: Add Anti-Slip Strips or Grooves
Though doing so is optional, for safety measures, we suggest you install anti-slip tape, rubber treads, or cut shallow grooves into the wood. This protects the wood surface and improves traction, especially during rain and snow.
Step 11: Inspect, Test, and Finish the Ramp
Last, but not least, it’s vital to double-check that all fasteners are tight, the frame is stable, and the ramp sits flush with the shed entrance.
To confirm that, do a quick test: simply walk up and down the ramp to test its strength. If everything looks good, you can apply a weatherproof sealant or several coats of paint to protect the wood from decay.
And you’re done building a shed ramp!
Want to use other Materials like Concrete, Steel, or Aluminum?
Well, below we’ve given a quick overview of exactly what changes in the process. However, you should wear a hi-vis jackets if you’re building a shed ramp in a high-traffic area or on a job site.
- For Concrete Shed Ramp: You need to pour a slab and do framing, and tamping (meaning creating ridges in the concrete).
- For Aluminum/Steel Ramp: Though, usually comes pre-made, and you only need to install and anchor it.
- Tuff Shed Ramps: They also come pre-built for Tuff Sheds. You only need to provide accurate shed rise and door width details to the brand. Then, you can just install per the brand’s instructions.
What Are the Differences: Shed Ramp vs Curb Ramp vs Kerb Ramp vs Slope Ramp
A “shed ramp” is an inclined surface that basically allows smooth access to a shed or outdoor storage unit. While the “curb ramps“ are also a sloped surface used to connect the road to a sidewalk to help move cars, hand trucks, wheelchairs, or bikes, they smoothly transition from the road.
Whereas “kerb ramps” is the British spelling of curb ramp, and functionally, it’s the same thing as curb ramp. And “slope ramps”, it’s a general term referring to any inclined surface that helps overcome elevation differences.
9 Best DIY Shed Ramp Ideas
As a homeowner, you can build a DIY shed ramp in the backyard garden shed, tool storage shed, garage entry shed, outdoor workshop shed, barn or utility shed, lawn equipment storage shed, portable or mobile shed units, raised platform sheds, tiny house storage sheds, and corner yard sheds. These are all common spots where you can build a shed ramp for easier access to tools, equipment, or mobility needs.
Portable Ramp for Shed with High-Density Weight Capacity
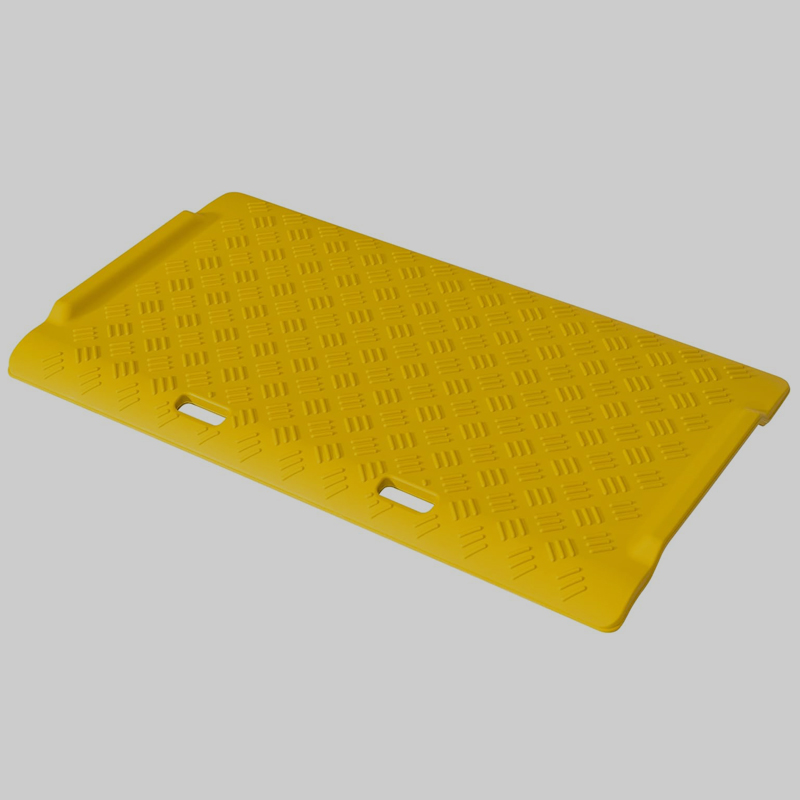
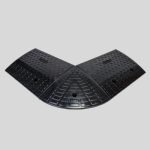
No doubt, wooden, metal, concrete, or shed ramps harbor freight are good options. But they aren’t always practical, especially if you need ramps for outdoor sheds, that’s portable, easy to move, install, can be removed seasonally, require less maintenance, and last longer. That’s where Jackwin curb ramps stand out as an all-in-one solution.
These ramps are portable, heavy-duty, easy to install and remove, travel-friendly, and built with industrial-grade rubber. Also, they can easily bear up to 40 tons of weight capacity. On top of that, these ramps have premium designs along with a water drainage channel and a smart anti-slip surface.
You can utilize these ramps in many ways. Such as a garden shed ramp (for loaded wheelbarrows, garden carts, lawn mowers), as a driveway ramp (for moving electric motorcycles, trucks), or even as a threshold ramp.

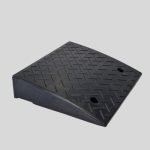
Shed Ramps for Sale
Non-slip rubber shed ramps in size 480x420x110mm are available at JACKWIN for sale, that too at highly competitive and affordable rates. They’re perfect for various applications such as wheelchairs, sidewalk garages, garden sheds, heavy-duty driveway curb ramps for doorways, and equipment loading ramps. Contact us today to get a quote.
Conclusion
Though building a shed ramp isn’t that tough if you have all the necessary tools available, the ramp angle, accurate measurements, and material choice play a crucial role. Because a miscalculated slope can make the ramp too steep and pose a risk of slipping and getting injuries, always double-check measurements and follow the process explained in this guide to make your shed ramp not only sturdy but also long-lasting.
FAQs
-
What is the best material for a shed ramp?
Well, the exact answer depends on your need, budget, and equipment weight. If we talk generally, wood is ideal for walking over gardens and other low-to-medium weight tools. Aluminum or concrete is ideal for walking over heavy-weight equipment. For portable applications, it provides good traction and is resistant to weather conditions; rubber is ideal.
-
What is the spacing for shed joists?
The spacing varies depending on the intended load. However, the general and standard spacing of shed joists is 16 inches on center. While for heavier loads, 12 inches on center is recommended.
-
What is the proper slope for a shed ramp?
It is 1:8, that is 8 inches per 1 inch of rise (ground-to-shed floor height). This slope minimizes the risk of slipping and lets you easily move equipment.

