

-80x69.png)
Road studs are small but impactful safety tools. They improve road visibility at night and during bad weather, ensuring public safety. However, with so many design variations, choosing the right road studs for your project can be challenging.
In this article, we break down the basics of road studs, their different material options, and best practices for installation.
What Are Road Studs?
Road studs are small pavement markers that reflect a car’s headlight and help guide drivers at night. They are made from resilient materials like ceramic, plastic, or aluminum with a small reflective film on the sides.
Since their invention in the early 1930s, road studs have become a mainstay of road safety. Today, road studs are used everywhere, including small streets, highways, and under tunnels and bridges.
The original road stud design had two reflective bulbs that looked like cat eyes at night. Hence, for many years, road studs were simply known as cat’s eyes.
The basic road stud shape has stayed the same since the 1930s. However, there have been several innovations in road stud design.
Shank vs Shankless Road Studs
Some road studs have a small spike at the base called a shank studs with a shank last longer due to their higher load-bearing potential.
- Shank Road Studs are harder to install. You need to drill a hole in the pavement and then apply a large force to press the studs into place. As an extra precautionary step, you can apply some epoxy adhesive to the road studs before installation.
- Shankless Road Studs can be installed more easily and quickly. Simply mark the installation areas, add a bit of adhesive to the base, and place the stud on the road.
Shankless designs also require fewer resources to install, which makes them an attractive option for contractors on a tight budget. Shank road studs are mostly limited to highways where they can support heavier vehicles.
Passive Road Studs
A passive road stud refers to the standard design that uses reflective films. These standalone studs don’t produce any light themselves. Instead, they rely on the headlights from oncoming traffic.
In the unfortunate case that your headlights are not working, passive road studs will become useless.

Active Road Studs
Active road studs have an internal light source (LED bulbs) that illuminate the roads. They have a small solar panel on top that charges the internal battery during the day.
Some active road stud designs include a reflective strip, so you can get the best of both worlds.

Every Material Used in Road Stud Manufacturing
The general road stud design has stayed the same for the last hundred years. However, manufacturers have made significant strides in construction materials.
Here is a complete list of materials used in the manufacturing of road studs.
Table 1- Comparing the Advantages & Disadvantages of Different Road Studs
| Road Stud
Materials |
Mechanical
Strength |
Weather
Resistance |
Lifespan | Cost |
| Plastic | Low | Medium | Short | Low |
| Aluminum | High | High | Long | Medium |
| Ceramic | Medium | High | Short | High |
| Glass | Medium | High | Short | High |
| Solar | Low | Medium | Short | Very High |
| Cast Iron | High | Low | Long | High |
1. Plastic
Plastic has quickly become the go-to material for manufacturing road safety equipment. It’s a lightweight, flexible, and non-reactive material that will last a very long time. All plastic road studs are made from polycarbonate or ABS plastic.
It is one of the few materials that is immune to environmental damage. Plastic road studs don’t rust, corrode, or degrade under natural conditions. They can occasionally deform under intense heat. However, due to the lower replacement cost, swapping out a new one is relatively easy. We recommend plastic road studs as the best economical choice.
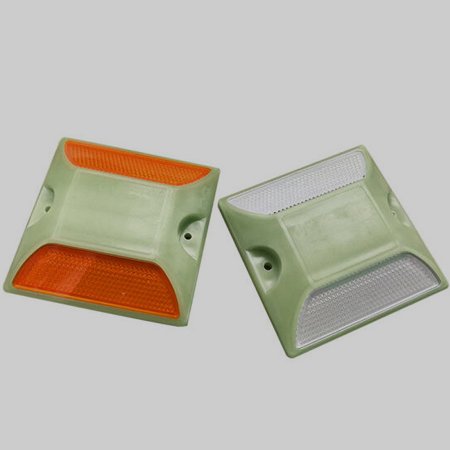
Table 2 – Highlighting the advantages and disadvantages of using plastic road studs.
| Plastic Road Studs | |
| Advantages | Disadvantages |
|
|
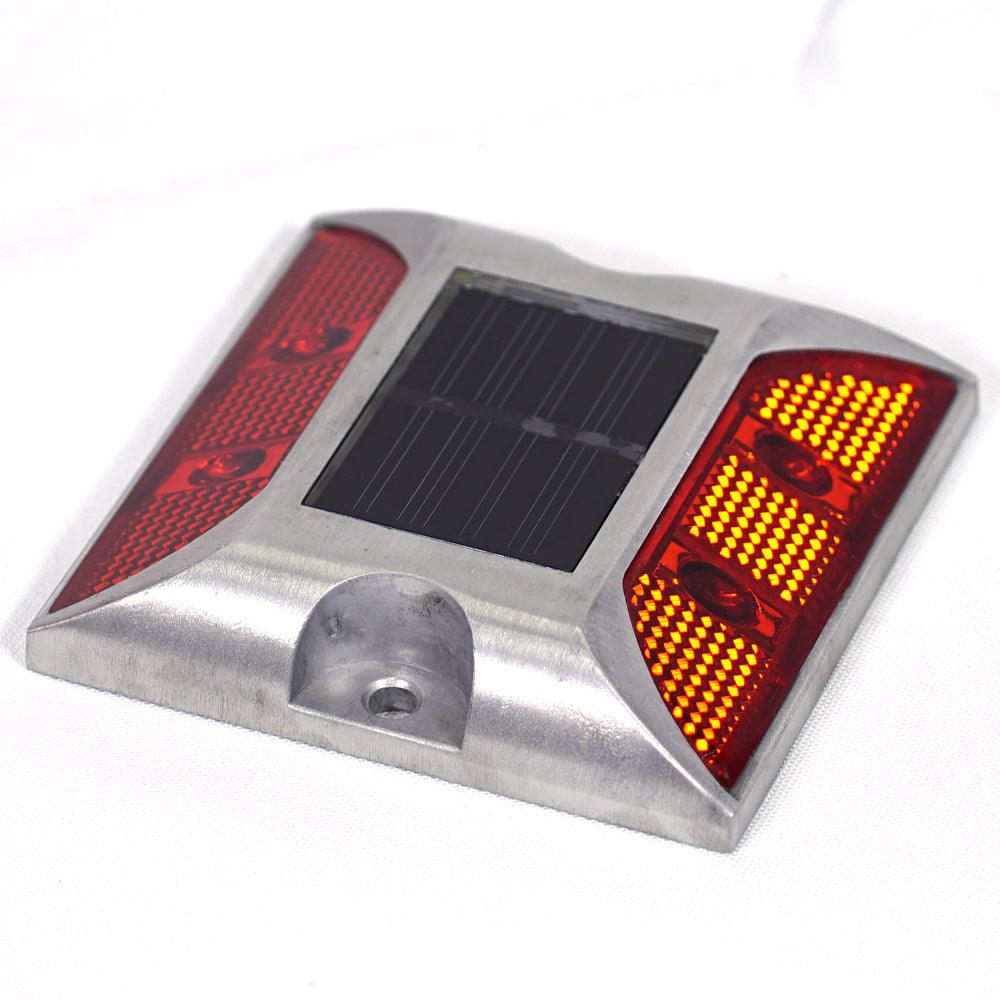
2. Aluminum
Aluminum is our next best choice for road stud manufacturing. It is a strong, durable material with excellent rust and corrosion resistance. Road studs are regularly exposed to harsh weather conditions, which pose no danger to a strong metal like aluminum.
Occasionally, a vehicle will run over a road stud. In those rare conditions, the stud must be able to withstand the full load of the vehicle. Since aluminum road studs have excellent mechanical strength, they’re commonly used in highway marking applications.
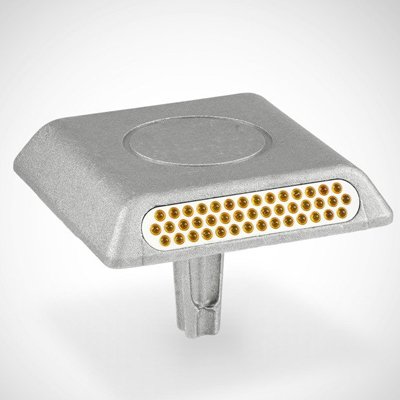
Table 3 – Highlighting the advantages and disadvantages of using aluminum road studs.
| Aluminum Road Studs | |
| Advantages | Disadvantages |
|
|
3. Ceramic
Ceramic road studs are made from a mixture of clay, earthen metals, and water, baked at a very high temperature. They are one of the toughest studs on the market and are resistant to almost every type of environmental damage.
Compared to other road stud designs, ceramic models offer two variants.
- Standard ceramic road studs have a reflective strip embedded into the design.
- 360 ceramic road studs have a reflective powder mixed into the glaze. Meaning the entire dome shape is a reflective surface.
Ceramics, by their very nature, are brittle. So, any sudden impact can result in cracks on the surface.
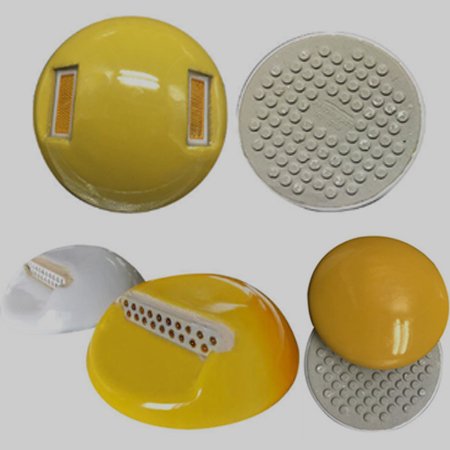
Table 4 – Highlighting the advantages and disadvantages of using ceramic road studs.
| Ceramic Road Studs | |
| Advantages | Disadvantages |
|
|
4. Glass
Glass has a bad reputation for being a weak material. However, glass road studs are made from tempered glass, which has higher mechanical strength and shatter resistance. The shatter resistance of tempered glass road studs is somewhere between aluminum and ceramic.
Unlike other materials on this list, glass is a difficult material to shape and control. Hence, glass road studs are twice the size of plastic ones and have a more rounded globe-like design. This shape makes it more difficult to install as you need special industrial equipment for drilling pilot holes.
Glass is a type of ceramic, made by superheating sand. It’s completely immune to heat, water, and chemical damage. It can withstand a large amount of compressive force such as the weight of a large cargo truck.
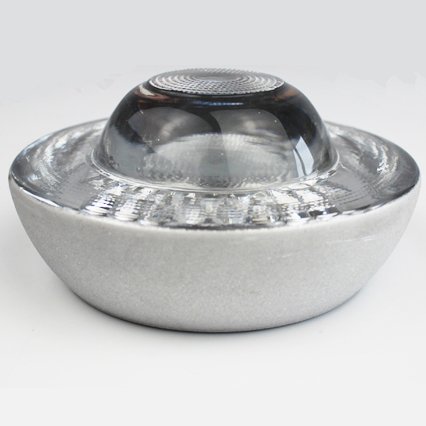
Table 5 – Highlighting the advantages and disadvantages of using glass road studs.
| Glass Road Studs | |
| Advantages | Disadvantages |
|
|
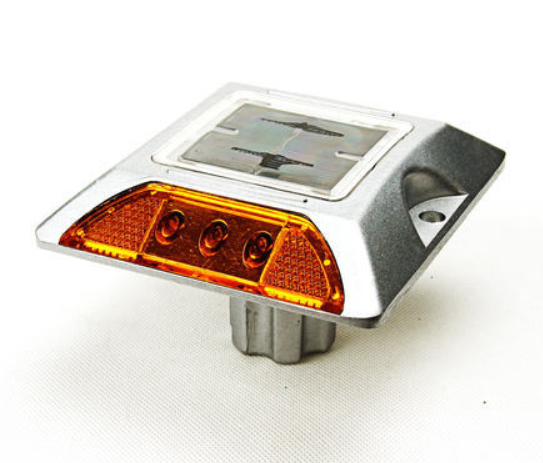
5. Solar
Solar road studs are a special type of active road marker that contains a small battery and light source (LED). Newer solar models have a hybrid design that contains a reflective strip and a battery.
These road studs have an exposed solar panel on the top surface, which charges the batteries during the day. When the sun sets, these studs shift into active mode and illuminate the road using battery power.
Unlike other material options, solar road studs are made from a combination of plastic and metal.
- A clear plastic protects the solar panel on top and the LEDs on the side.
- A metal cage provides increased structural support and additional protection.

Table 6 – Highlighting the advantages and disadvantages of using solar road studs.
| Solar Road Studs | |
| Advantages | Disadvantages |
|
|
6. Cast Iron (Discontinued)
The original cat’s eye road stud design had two reflector cores (cat eyes). These reflectors were encased in a rubber dome and mounted to a cast-iron base.
Cast iron road studs were very bulky and needed several complicated manufacturing processes to fabricate. The larger size also resulted in a higher manufacturing cost.
Even today, many older roads use cast iron road studs. However, newer materials and manufacturing techniques have made them obsolete.
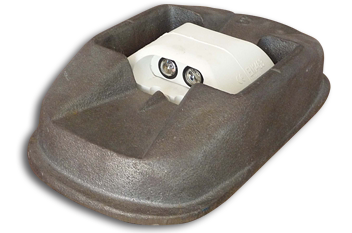
Table 7 – Highlighting the advantages and disadvantages of using cast iron road studs.
| Cast Iron Road Studs | |
| Advantages | Disadvantages |
|
|
Every Road Stud Color and Its Meaning
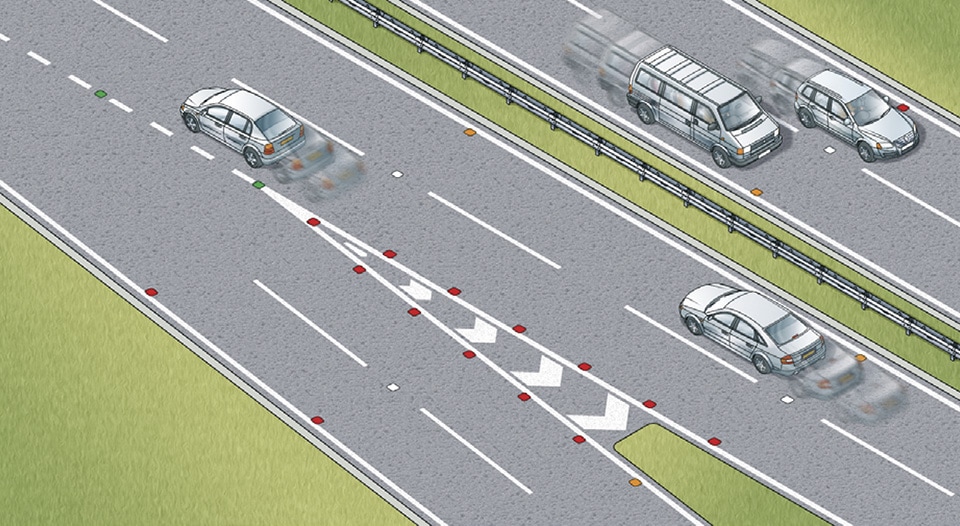
Road stud designs are classified by their reflective colors. Each color represents the placement and application of the road stud.
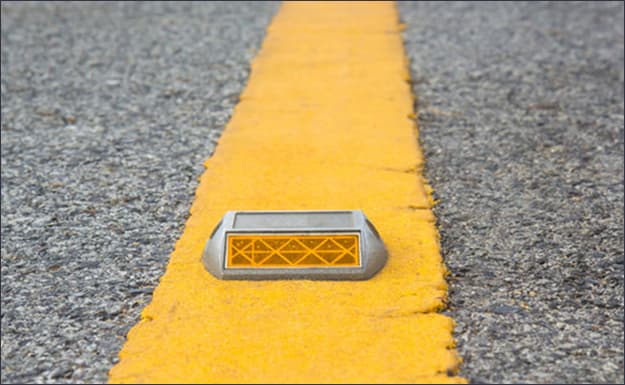
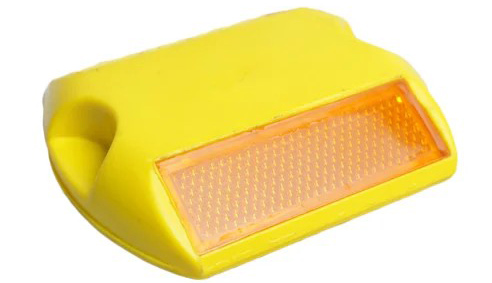
1. Yellow Road Studs
Yellow road studs are placed at the outer edge of the road. They provide a clear boundary line that marks the end of the drivable area. It also helps guide drivers around sharp turns, ensuring they see the curve.
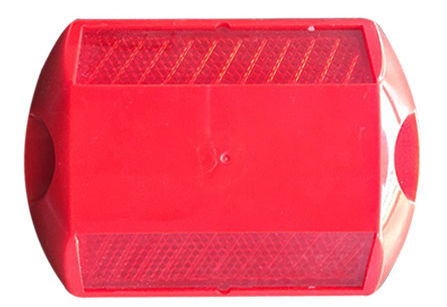
2. Red Road Studs
Red road studs mark potential hazard areas and danger zones. Potential hazards include a cliff or forest at the side of the road, which is not visible at night. Although red road markers are most commonly used as indicators for upcoming converging and diverging lanes.
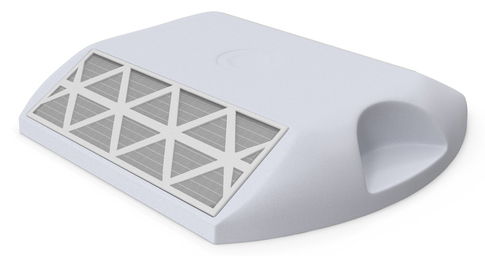
3. White Road Studs
White road studs are used as dividers for each driving lane. So, a highway with three driving lanes will have two rows of white road studs in the middle, ensuring drivers stay on course.
These road markers are best suited for highway applications, where cars are driving at high speeds.
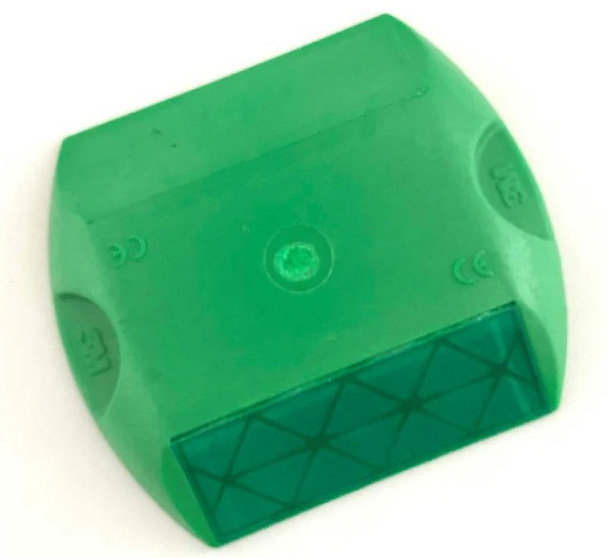
4. Green Road Studs
Green road studs are used to indicate crossable lanes. It’s primarily used to indicate exit points on a highway or highlight bus stops.
You will rarely see green road studs outside of the United Kingdom. Most countries only use red and yellow road markers.
Step-by-Step Guide to Road Stud Installation
Road stud installation is fairly simple as long as you have the right tools and knowledge. In this section, we guide you through the installation process step-by-step.
Tools & Materials Required
Here is a list of tools and materials you will need for the installation.
- Reflective Road Studs
- Adhesive for Installation (Epoxy Resin)
- Industrial Drill with the Relevant Bits (Situational)
- Measuring Tape & Chalk Line
- Road Cleaning Equipment
- Traffic Cones & Construction Signs
- Personal Protective Equipment for Workers (safety vests, gloves, goggles, etc.)
Step 1 – Pre-Installation Requirements
First, make sure your road is clean and dry. Do not install the studs right after a rainy day. The adhesive will not stick to wet pavement. Let it dry for a day before working.
You will also need to remove any dust, debris, or oil from the surface to ensure optimal adhesion. This is where that road cleaning equipment comes in handy.
Additionally, pick a time of day when there is minimal road traffic. This is crucial as it prevents traffic jams and ensures worker safety.
Step 2 – Mark Road Stud Spacing & Placement
Road stud spacing is based on the vehicle speed. The distance between two consecutive road studs increases for fast traffic and decreases for slow traffic.
- Highways Spacing – 6 to 9 Meters (20 to 30 Feet)
- City Roads – 3 to 6 Meters (10 to 20 Feet)
- Intersections – <1 Meter (3 Feet)
Use a measuring tape and chalk line to accurately mark road stud installation points. Learn more about road spacing here.
Step 3 – Drilling Holes (Optional)
Road studs with shanks require pilot holes in the pavement. Make sure you have a powerful drill and a carbide bit to cut through the hard ground. Look at the product specification for the shank diameter and pick an appropriately sized drill bit.
Clean around the drill hole to remove the dust and debris.
Step 4 – Prepare the Adhesive Mixture
Road studs are mounted using a strong two-part epoxy. As epoxy cures relatively quickly, you need to work in small small batches to minimize loss. Consult with the road stud manufacturer for the recommended epoxy.
Be extra careful when working with epoxy. Skin contact, in particular, can cause a severe allergic reaction.
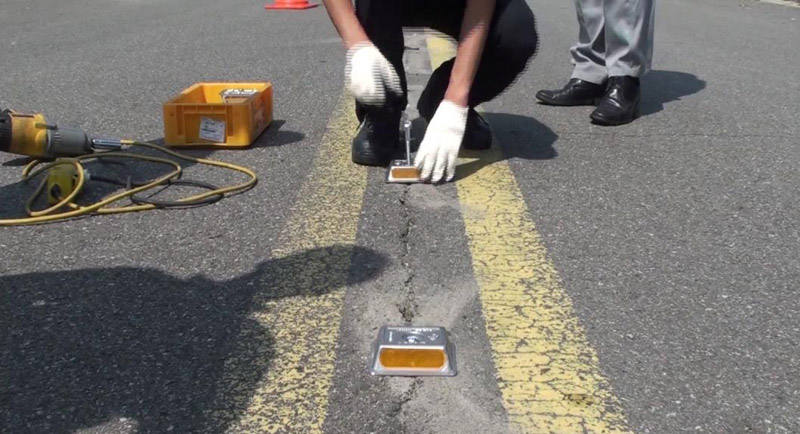
Step 5 – Stud Placement & Installation
Now, apply the epoxy to the ground and carefully place the road studs in the desired spot. Make sure the reflectors are pointed towards the incoming traffic.
If you are using road studs with shanks, you will need to apply additional pressure using a mallet. Apply enough pressure so the excess epoxy squeezes out from the sides.
Step 6 – Wait for the Adhesive to Cure
Most epoxy resins harden within an hour. Heat and UV from the sun accelerate the curing process. When working on a long project. The first few road studs will cure by the time you reach the end of the road.
Step 7 – Perform a Load Test
Drive a large vehicle over the road studs to test their durability. All studs should withstand a maximum load as listed on the product spec sheet. Testing now will reveal any defective studs that can be quickly replaced.
Afterward, perform a nighttime test and make sure all studs are properly illuminated.
Step 8 – Post-Installation Maintenance
Road studs are low-maintenance items. So, as long as you employ some basic inspection and maintenance practices, these road markers will last a very long time.
- Use street sweepers to regularly clean the road studs along with the roads.
- Perform periodic road inspections and look for damaged or defective road studs.
- Replace damaged road studs regularly for maximum road safety.
Why Are Road Studs So Important to Road Safety?
Road studs play a very important role in keeping our streets, roads, and highways safe. Here are four important applications of road marking.
1. Marking Road Edges
Road studs clearly define the outer edges of a road. This is especially useful in low light and poor weather conditions. Studs keep drivers in their respective lanes and prevent vehicular accidents.
2. Visual Indicators of Sharp Turns
Road studs also provide a clear visual representation of an upcoming turn. They inform drivers that the road ahead is curved and vehicle speed should be reduced.
3. Hazard Warning
Road studs also provide hazard warnings to drivers. Well-placed studs inform drivers about nearby intersections, construction zones, and pedestrian crossings.
4. Speed Reduction Tools
A cluster of road studs is often used as speed breakers. Ensuring drivers stay within speed limits, especially in residential areas and school zones.
Conclusion
Road studs are an excellent safety tool in our modern society. It’s a tried and true design that has stood the test of time. Nearly a hundred years after its invention, the humble road stud has seen very little change. The only thing that has changed is its material choices. We now have road studs made from plastic, aluminum, and even glass. Governments have detailed regulations about road stud placement and color coding. It’s clear that these tools are necessary for road safety, and we should encourage their widespread adoption.
Get High-Quality & Long-Lasting Road Studs at Jackwin!
Jackwin is a producer and supplier of reliable traffic safety and parking equipment. Our key products include traffic cones, road studs, traffic signage, and parking locks.
With our 18 years of manufacturing expertise, we have established mutually beneficial relationships with over 20,000 businesses in over 70 countries. Our products comply with various regional certifications, including ISO, RoHS, SGS, POCE, and more.
Make your next road project a success with Jackwin! Contact us Now!

