

-80x69.png)
In the early days, painted lines on roadways were used to guide traffic, highlight lanes, and enhance visibility. But these painted lines have limitations. Such as they become nearly invisible when wet or in low-visibility. That’s where raised pavement markers stand out. They are smart and advanced mini safety devices that rule out all limitations that painted lines had.
So, whether you’re a road construction company or a traffic safety professional, it’s important for you to know about raised pavement markers. Like what their purpose is, their types, color codings, compliances, and much more. And that’s why we’ve prepared this guide for you. So you can make an informed decision while choosing RPM and contribute to safe and managed roads.
What is a Raised Pavement Marker?
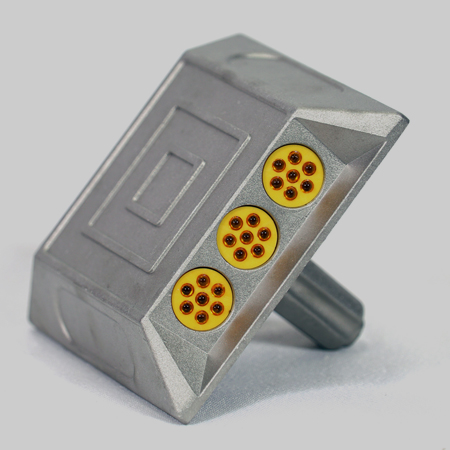
A Raised Pavement Marker (RPM) is a small, durable, and shiny-reflective device. They are attached to the road surface. You mostly see them on lane lines, highways, centerlines, and road edges. These small devices provide visibility to drivers, especially at night or in bad weather. So that drivers drive within their lanes and do not cross over. Additionally, even if a driver crosses over, these markers issue a minor alert and prompt them to return to their lane.


Working of Raised Pavement Marker
Generally, raised pavement markers serve a 2-in-1 solution. They work in two ways:
- Enhance Visibility (Reflect Light)
Suppose a driver is driving during nighttime, you know, at such low-visibility conditions, it is often difficult to see the lane paint. But with raised pavement markers, visibility is enhanced a lot. So when drivers’ vehicle headlights fall on the RPM, they start shining and reflect light directly in the driver’s eyes. That way, it’ll become easier for drivers to stay within their lane.
- Give a Tactile Warning
But even in case the driver drifts from their lane due to low visibility. So as they cross the lane, their vehicle hits the marker. That gives them a vibration and also tells them that they are out of their lane. That way, they will revert and drive in their lane. Apart from that, these markers also protect drivers and prevent them from going into no-entry zones.
Other names of Raised Pavement Markers
Depending on the raised pavement marker’s functioning, looks, material, and design, people (from different regions or cities) call them with other names as well:
- Botts’ Dots – Named after Elbert Botts, a California (Caltrans) engineer. Generally made of ceramic or plastic, they are in round shape and small size. Commonly used on California highways.
- Raised Reflectors – Highlights their reflective properties (glow when vehicle’s headlights hit them).
- Road Studs – Common in the UK, Australia, and New Zealand.
- Cat’s Eyes – Reflective markers with a lens-like design (originally patented in the UK).
- Pavement Domes – Refers to dome-shaped RPMs. Plus, it gives a tactile warning to vehicles.
- Raised Ribs – Used for rumble-style tactile markers. They give off vibration when the vehicle drives over them.
- Tactile Pavement Markers – Similar to the above term, these markers also provide vibration/audio feedback to drivers.
- Solar Road Studs – When markers are equipped with solar-powered LEDs. Often used in tunnels and foggy areas.
- Reflective Dots – Emphasizes their retroreflective function and bounces light towards the driver.

Common Raised Pavement Marker Types
Despite their simple working and purpose, raised pavement markers come in different types to cater to different types of traffic situations, visibility, and weather conditions. Below, we have explained RPM types for you based on their working modes :
-
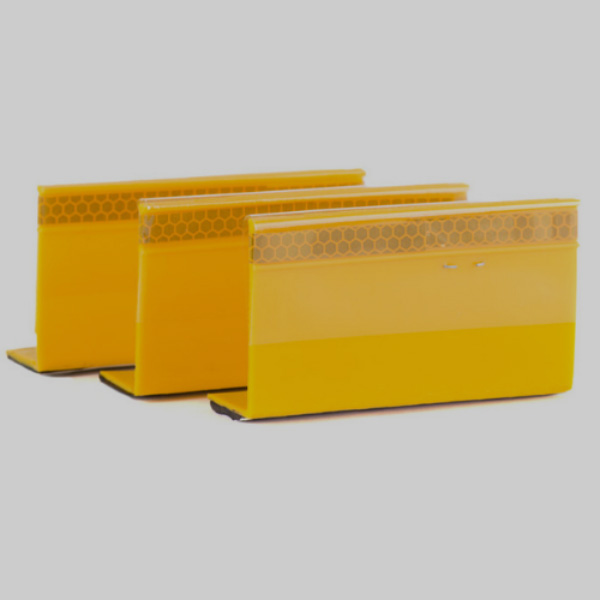
Reflective Raised Pavement Marker
This is the most commonly used type of RPM. As the name suggests, they are reflective markers. Means they reflect shiny light when a vehicle’s headlight falls. You can install them anywhere where visibility is highly needed or at high-traffic zones, such as highways, tunnels, etc. Their main purpose is to enhance visibility to drivers and show them clear lane markings.
-
Non-Reflective Raised Pavement Marker (NRPM)
Non-reflective raised pavement markers, on the other hand, do not have a shiny or reflective surface. Instead, they are meant to give a warning to drivers. Suppose a driver slightly drifts out of their lane. Here, markers will give a slight hit to the vehicle and tell them to stay in their lane.
You can install them anywhere where visibility is not an issue, such as residential areas, parking lots, or low-speed areas where lightning is already good. Their purpose is to physically guide the drivers, not visually.
-
Snowplowable Raised Pavement Marker (SRPM)
These raised pavement markers are typically reflective markers. But specifically designed for places that get heavy snow or where snowplows are often used. Unlike other pavement markers, they can resist impact. Plus, do not get damaged or lose when in contact with snow plows or any road construction equipment. Typically built with durable materials such as heavy-duty plastic or stainless steel.
-
Temporary Raised Pavement Markers (TRPM)
Well, they are temporary markers, and can be reflective, non-reflective, or snowplowable (depending on road and visibility situation). Typically, they are made with lightweight material, so they can be easily installed and removed.
You can use them for any short-term purposes, such as during your road repair, construction, repaving projects, or temporary detour jobs. That way, you can focus on your project while guiding drivers about safe lanes during both day and nighttime.
What are Raised Pavement Markers MUTCD Standards?
Raised pavement markers MUTCD standards are the official guidelines that tell facilities how, where, and when to use raised pavement markers. These standards also mandate regulation for RPM design, material, colors, and even key features guidelines to cater to every type of weather, road, environment, and traffic conditions.
The purpose of these standards is simple. And that’s to make roads safer and more consistent across the U.S. Hence, to reduce the chances of accidents and ensure drivers’ safety.
Raised Pavement Marker Material Types & Color Standards
Material Types
Here are raised pavement materials that JACKWIN uses to manufacture ISO-compliant raised pavement markers:
- Plastic: Plastic RPM are very lightweight, corrosion-resistant, and cost-effective. You can use them on low-traffic roads or for temporary purposes during road repair or construction work. However, it can crack due to the impact of a heavy vehicle.
- Ceramic: They are made with tough ceramic material, are durable, weather- and impact-resistant, and have a bumpy texture. That makes them ideal for use in roads for lane disciplines.
- Copper or Brass: Generally made with durable material, they are corrosion-resistant and have a long lifespan. But they are less strong than other materials. You can use them on premium driveways or historic districts.
- Glass: We made them with high-quality glass material, which is highly wear-resistant and reflective during low-light conditions. You can use them in places where high visibility is a must, such as sharp curves or near edges.
- Aluminum: We use high-quality aluminum material to make RPM more durable, robust, long-lasting, and wear-resistant. Plus, they can easily hold up under traffic pressure. That makes them ideal for use on busy roads and highways.
- Stainless Steel: They’re stronger than aluminum markers, are strong, durable, long-lasting, and rust-proof. However, they are expensive among others. You can use them in industrial zones, snow-prone zones, or areas where heavy-weight traffic often passes.
- Solar: They are more reflective markers compared to others. During daytime, they charged via sunlight (using solar panel). At nighttime, they lit up their LEDs and were visually guided. You can use them for temporary/ permanent purposes in dark or low-visibility zones.

Color Standards (MUTCD Section 3B.14)
| Color | Purpose | Common Application |
| White | Lane lines, edge lines | Freeway lanes, exit ramps |
| Yellow | Centerlines, no-passing zones | Two-way roads, curves |
| Red | Wrong-way traffic | Exit ramps, one-way streets |
| Blue | Fire hydrants | Non-driving areas (e.g., shoulders) |
| Purple | Toll/HOV lanes | Express lanes (state-specific) |
| Green | Safe Zones, special lanes | Bicycle Lanes, pathways |
Raised Pavement Marker Specifications
Mounting Methods
Well, the mounting methods of RPM depend on several factors. Such as traffic volume, road surface, climate and even your budget. Below, we’ve explained commonly used mounting methods for you to clear your understanding:
- Adhesive Mounting
Well, if you use this method, you need to use a strong adhesive like epoxy resin or bitumen. Then apply it under RPM and directly fix it onto the pavement. It’s quick, reliable, and works well for both reflective and non-reflective types.
- Mechanical Fastening (Bolt-On)
Here, you need to use bolts or screws to attach the RPM to the surface. You can use this method in areas with high-speed traffic or where vibration could loosen adhesive-based markers.
- Embedded Mounting
In this method, you need to set RPM into a groove or slot cut into the pavement. Then seal and secure it with adhesive. You can use this method in snowplow areas where there is a risk that RPMs may scrap off.
- Surface Mounted (Nail-On)
As the name says, the RPM is nailed or pinned to the road. That makes them ideal for use in temporary installations or non-reflective markers during your road repair or construction projects.
- Magnetic Mounting
Although this method is rarely used, it is useful for temporary placements, especially during events or road tests. These markers have magnetic bases so you can easily place or remove them without damaging the surface.
Spacing
- On normal roads (straight sections), place RPMs every 80 to 100 feet.
- On roads with sharp curves or hazardous areas, reduce the spacing to every 20 to 40 feet for better visibility.
- In urban or low-speed zones, ensure that the spacing is a bit tighter. Such as around 30 to 60 feet, especially if there’s heavy traffic or frequent lane changes.
- For centerlines or edge lines, stick to a consistent pattern. For example, a skip-line pattern where a reflector is placed in line with every painted dash.
- When installing reflective RPM, they should be placed close enough. This helps ensure they reflect headlights clearly without gaps in guidance.
Standard RPM Dimensions (U.S. & International)
| Type | Length (mm/in) | Width (mm/in) | Height (mm/in) |
| Flat Adhesive RPMs | 150–300 mm (6–12 in) | 50–100 mm (2–4 in) | 10–20 mm (0.4–0.8 in) |
| Recessed RPMs | 150–250 mm (6–10 in) | 50–100 mm (2–4 in) | 6–15 mm (0.25–0.6 in) |
| Snowplowable RPMs | 200–300 mm (8–12 in) | 75–150 mm (3–6 in) | 5–12 mm (0.2–0.5 in) |
| Heavy-Duty RPMs | 200–400 mm (8–16 in) | 100–200 mm (4–8 in) | 15–25 mm (0.6–1 in) |
| Circular/Button RPMs | 100–150 mm (4–6 in) | – | 10–20 mm (0.4–0.8 in) |
Apart from the above-mentioned RPM dimensions specification, here are a few more key points to consider:
- Facilities must ensure that RPM height must be ≤25 mm (1 in) to avoid vehicle damage, especially in snowplow areas.
- The RPM width should be (≥100 mm / 4 in). That way, they’ll be more visible to drivers.
- Use longer lengths (≥200 mm / 8 in) RPM on high-speed areas, such as highways for enhanced reflectivity.
Placement Rules
- If placing RPM to improve visibility, then install markers near lane marking, centerline or lane dividers.
- In urban areas, place them 6–12 meters (20–40 feet) apart. If placed on rural or highway roads, then install them 9-36 (30–120 feet) apart.
- For the centerline that is dividing opposite traffic flow, use Yellow raised markers.
- For lanes and edges that let traffic pass in the same direction, use white markers there.
- To provide one-way road or wrong-way alerts to drivers, use red markers.
- Use blue colored RPM to highlight areas of fire hydrants and emergency access.
- Where visibility on roads is not an issue, use non-reflective markers for physical guidance.
- Where visibility is low, install reflective RPMs to both visually and physically guide drivers.
- At places where power outages often occur, or on rural roads, install solar RPM for enhanced visibility during nighttime.
- Do not place RPM where there’s a chance of interference with cycling lanes or motorcycle paths.
What is the Raised Pavement Markers Price?
Well, if you ask us about the RPMs price, then we would say that it depends on the RPM’s type, material, reflectivity and mounting method. Generally, a single standard reflective RPM price is around $5-$20, while high-intensity reflective RPM costs you around $15-$40. On the other hand, the solar-powered RPMs price is around $50-$200, while snowplowable RPMs cost you $20-$80.
Apart from that, if you buy just one or a few raised pavement markers from a supplier, the overall price will be much higher. That’s why we suggest you buy in bulk from a trusted raised pavement marker supplier, like us. We have a large stock of RPMs available across all materials. If you order from JACKWIN, we will provide RPMs at highly competitive wholesale prices.
How to Choose the Best RPM for Your Needs?
- Firstly, you need to identify the purpose of installing RPMs. What’s your purpose? To improve nighttime visibility? To guide traffic? To mark a fire hydrant? Or warn drivers of wrong-way entry?
- Once you’ve identified, the next step is to evaluate the road condition where RPM needs to be installed. If the area has high-speed traffic, then go for durable markers. If the site is a construction site, go for temporary markers. If the site is a snow zone, go for snowplowable markers.
- Next, you need to select the markers based on working modes. Suppose if you need to install to enhance visibility on high-speed zones, such as highways, tunnels, curves (go for reflective markers). If you need to install for only guidance on well-lit roads, go for non-reflective markers. For rural or no-power sites, go for solar markers.
- After you have chosen the type, next select the color. You need to choose a color based on the marker’s purpose. Such as for same direction lanes (white markers), centerline/ opposite traffic (yellow markers), do-not-enter zones (red color), fire hydrant/ emergency access (blue markers).
- Next up, select the mounting method for RPM installation. We suggest you go for adhesive mounting (for smooth roads), bolt-on (for rough/ high-impact zones), embedded (for snowplowable areas), and magnetic mounting (for temporary use).
- The last and final step is to consider your budget and the marker’s durability. If you’re looking for durable and high-quality markers at a wholesale rate, JACKWIN is the perfect choice. We manufacture ISO and local regulations-compliant markers and supply them across several countries. So contact us today!
Benefits of Raised Pavement Markers in Ensuring Drivers’ Safety
Improved Visibility: When installed on roads, they bounce shiny light back towards drivers. That way, they enhance visibility for drivers, especially at night or in bad weather.
Better Lane Guidance: They clearly mark lane boundaries that help drivers understand and stay in their lanes. This also reduces the chances of a vehicle’s crossover and accidents.
Alert to Hazards: During driving, if a driver drifts from their lane, these markers signal drivers (via vibrating vehicle). This way, they alert drivers of hazardous areas, like sharp curves or no-entry zones, and prevent them from danger.
Reduced Road Fatigue: When drivers continuously see on the roads for their lanes, this often causes driver fatigue. But markers help them maintain focus on long stretches of road, reducing fatigue.
Clearer Directional Marking: Color-coded RPMs (white, yellow, red) guide drivers more effectively. Specially in terms of lane direction, wrong-way entry, and dividing traffic flow.
Cost-Effective Safety Tool: RPMs are the most cost-effective safety solution compared to other traffic safety devices.
Steps for Raised Pavement Markers Installation
- First, pack the raised pavement markers securely and transport them to the installation site.
- Once markers and your crew have arrived, the next step is to block the installation site. We suggest you use traffic barriers like cones or barriers and install them near the installation site. This helps inform drivers of the roadwork ahead. Plus, it ensures the safety of workers and drivers.
- Next, thoroughly clean the marker’s installation area. That way, the road will be free from debris or dirt, and markers will be installed firmly.
- Once done, mark the marker’s placement point according to spacing guidelines (check the spacing table above). That way, you can ensure proper alignment and functionality.
- The next step is to install the RPMs. For adhesive-mounted markers, apply the adhesive to each marker. Then, press the marker into place and hold it (for a few minutes) until the adhesive begins to set. For bolt-on or embedded markers, align the marker in the marked spot. Then, drill holes into the surface, insert bolts, and tighten securely. For surface-mounted or nail-on markers, nail the markers into place. And that’s it.
- After installation, double-check the alignment and positioning of each marker. You must make sure that they are uniformly placed and are visible from the driver’s perspective (try seeing yourself).
- Once you’re done with installation, don’t forget to remove any barriers or traffic cones and reopen the lanes.
Bonus Tip: We suggest that you regularly check the markers and clean them. Plus, also inspect them and if you find any damaged markers or markers that have la oosened reflectivity function, replace them immediately!
Wrap Up
We hope that after reading this guide, you now have a full understanding of raised pavement markers, their importance in guiding and protecting drivers, and where RPM is suitable for installation. So if you’re looking for raised pavement markers, check our catalog. Our RPMs are made with high-quality, durable material, are wear and corrosion-resistant, and long-lasting. So, contact our team today and contribute to safer roads.

